
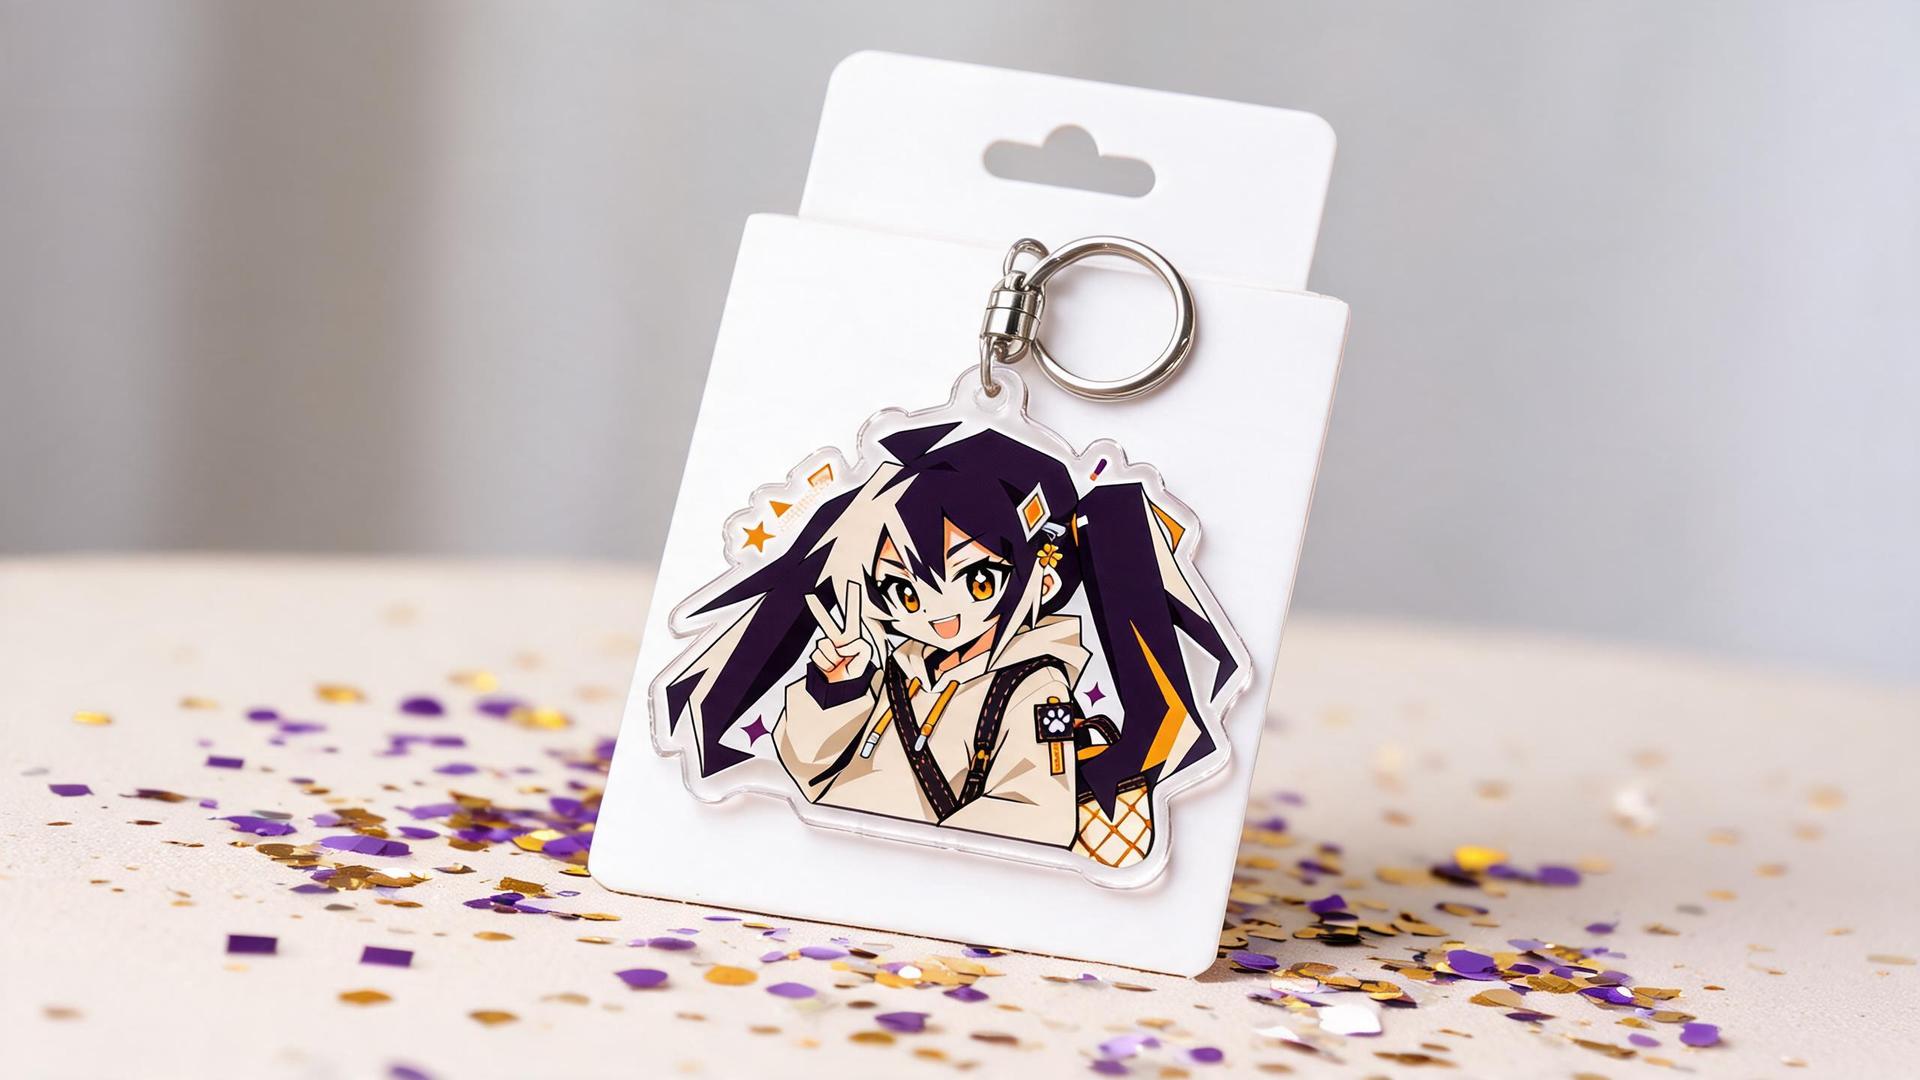
A shaker keychain is not a flat acrylic keychain with extra pieces dropped on top. The artwork is read in layers, and the loose pieces travel in front of it inside a closed shaker area that you approve before production. This guide sets out the order to settle those decisions so a quote request and a proof review can move without rework.
A custom acrylic shaker keychain holds loose printed pieces inside a closed clear acrylic body, so the artwork reads in layers instead of as one flat image. Plan it in this order: keep the face, text and logo unobstructed, split the art into background, moving elements and foreground, lock size, thickness, edge treatment and hanging-hole clearance, then send files for a proof.
01
Key Takeaways
Before the detail, these are the decisions that matter most when specifying custom acrylic shaker keychain.
- A shaker keychain reads in layers rather than as one flat image, so the art has to be separated into a background, the loose moving elements and a foreground before sizes or hardware are chosen.
- Faces, text and logos should sit where nothing travels across them; move floating pieces over areas of the illustration that can be partly covered.
- Lock finished width and height, overall thickness, edge treatment, the closing of the shaker area and hanging-hole clearance before you approve a quote, because each one feeds back into the file setup.
- Send a transparent PNG, a cut contour, separated layers, color intent and a placement note for every moving element in the order.
- A design with moving parts adds placement, travel-room and layer-order checks to the proof review, and those checks happen before production, not after.
02
What a shaker keychain is, and how the artwork reads
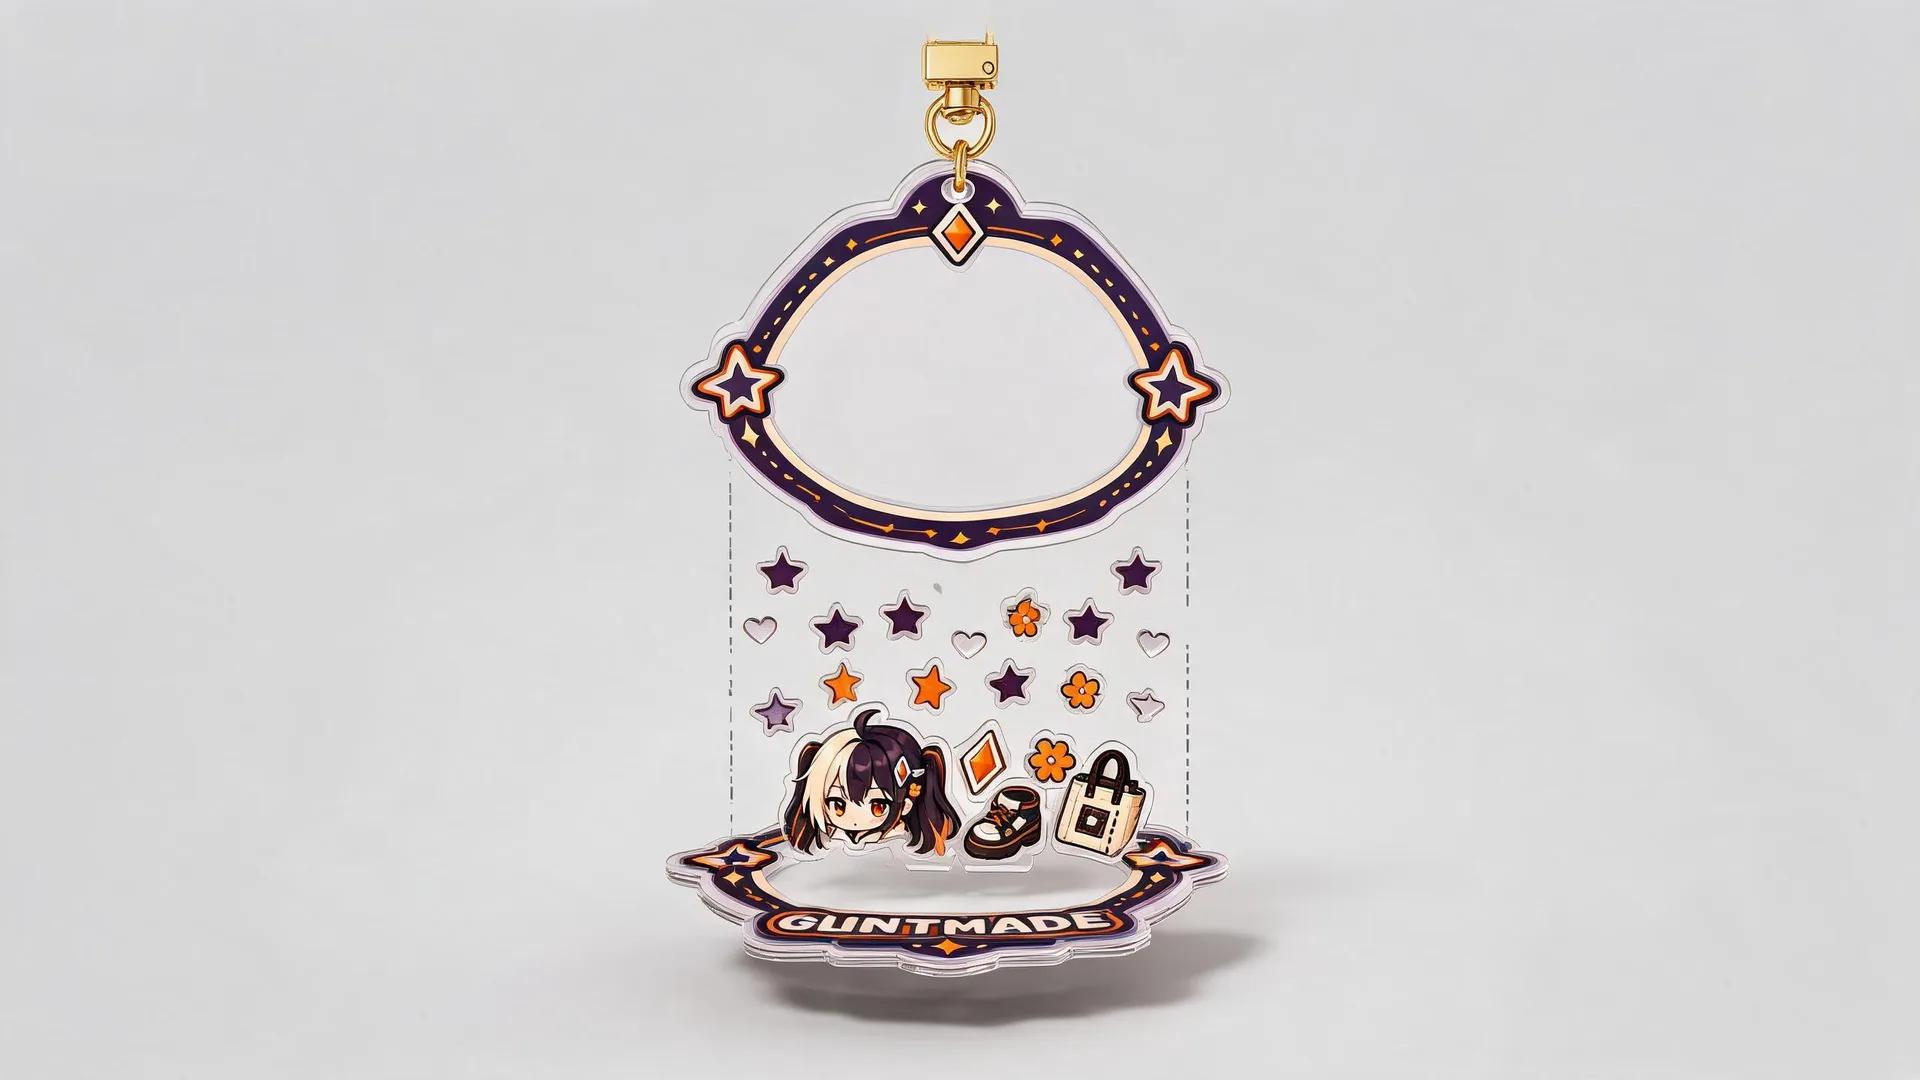
A shaker keychain is a sealed build. Clear acrylic forms the front window, and a closed cavity sits between that window and the printed layer behind it. Loose pieces live inside the cavity. Tilt the keychain and they slide, roll or settle against the inside edge. Because the front panel is clear, the printed artwork stays visible at the same time as the motion in front of it. A flat acrylic keychain works on a single plane: artwork on one surface, cut to a contour, with no cavity and nothing loose inside the body.
That difference changes the order a viewer reads the design. On a flat keychain you take in the whole illustration at once and the eye travels across it. In a shaker, the eye lands on the moving pieces first, then on the clear window, then on the printed layer behind. Depth reads before subject does. If a loose piece comes to rest over the character's face or over a line of text, the viewer has to hunt for the point of the art. Plan where pieces settle, not only the outer silhouette.
Plan around how the piece hangs. A keychain hangs from its hardware, so loose pieces gather along the lower edge of the shaker area when the piece is at rest. That lower band is where the moving elements will sit most of the time, so keep critical artwork above it or make those low elements worth reading on their own. Decide the number of loose pieces before you draw, because a crowded cavity reads as noise and a thin one reads as an accident.
- Shaker: clear acrylic front panel, a closed cavity, and a printed layer behind it.
- Flat acrylic keychain: one plane, cut to contour, no cavity and no loose parts.
- Reader order in a shaker moves from moving pieces, to clear window, to printed layer.
- Loose pieces drop to the lower edge when the keychain hangs, so protected art belongs higher up.
03
Which parts of the illustration must stay unobstructed
Before you split a single layer, name the zones that can never be hidden: the face, any text, and the logo or IP mark. A loose piece that crosses a pupil or a mouth line changes the character's expression every time it settles somewhere new. On a flat acrylic keychain the printed art is the whole read, and nothing travels over it. In a shaker keychain the floating pieces move in front of the artwork, so any zone they cross is only partly visible at a given moment. Treat those zones as fixed, and design the motion around them rather than through them.
Mark the protected zones on the art instead of holding them in your head. Build a top layer in your working file, draw a closed path around each face, text block and logo, and fill it with a flat color at low opacity. Name the layer so nobody mistakes it for artwork, and keep it out of the exported transparent PNG. When you test a moving piece, drag its outline across the full range it can travel and check every position against those shapes. If a path crosses a protected zone, resize the piece, reshape it, or move it to another region of the design.
Give the motion a region the design can absorb. Open background space, a flat color field, stars, petals or small repeated shapes tolerate a wandering piece because nothing behind them carries information. Fine text sits at the opposite end. A signature line, a handle or a copyright note becomes unreadable the moment a piece covers one letter. If the piece count is high or the pieces are large, the protected zones shrink and the artwork has to open up to compensate. Settle that balance before you request a quote, because it decides how the layers get split.
- Face: eyes, mouth line, and the outer edge of the hair silhouette.
- Text: character name, series title, signature line, copyright note.
- Logo: the IP mark and any small repeating brand element.
- Guide layer: closed paths on a top layer, low-opacity fill, excluded from the export.
- Travel test: move each piece across its full range and check every position against the guide.
04
Splitting the art into background, moving elements and foreground
Split the illustration into three planes before you touch the file. The background plane holds everything that stays still: the character's body, the setting, any text that must remain readable. The middle plane is the shaker area, where loose pieces travel. The foreground plane is a partial printed layer that sits in front of the shaker area. When a viewer looks at the piece, the eye reads the background first, then catches the motion, then lands on any foreground detail. If you put the same weight of detail on all three planes, the motion competes with the art. Decide which plane carries the story.
Moving pieces should not carry critical information. A loose piece rotates, flips and stacks against other pieces, so fine linework or small text on it will disappear. Use solid shapes, silhouettes or simple icons for the moving elements. Props, sparkles, small symbols and secondary motifs work well because the viewer does not need to read them. Keep the moving pieces in colors that contrast with the background plane. If a moving piece is the same color as the background, it vanishes when it drifts over that area. Test each moving piece against the busiest part of the background.
The foreground plane adds depth, but it can also block the shaker area. Use it for a few deliberate elements that overlap the loose pieces, such as a hand, a prop or a border. Keep the foreground cut contour separate from the background contour. Do not place foreground elements over the character's face, logo or any text you marked as protected. A foreground piece that covers a moving piece will also hide the motion, so leave gaps. When you send the file, include a placement note for each moving element so the proof shows the intended start position.
- Background plane: fixed art, face, text, logo, large color fields.
- Moving plane: loose pieces, simple silhouettes, high-contrast colors, no small text.
- Foreground plane: partial overlap only, separate cut contour, never over protected zones.
- Placement note: list each moving piece and where it should sit at proof stage.
| Aspect | Flat single-layer acrylic keychain | Acrylic shaker keychain |
|---|---|---|
| How the artwork reads | One printed layer read through the acrylic | Artwork read in layers, with loose pieces moving in front of it |
| Moving parts | None | Floating elements that travel inside the shaker area |
| Layer separation in the file | Artwork supplied as one design | Background, moving elements and foreground supplied as separate layers |
| Job of the cut contour | Follows the outer silhouette of the design | Follows the outer silhouette while keeping the shaker area distinct from the hanging hole |
| Placement notes needed | Not required | One note per moving element, covering starting position and travel room |
| Proof focus | Color and cut line | Color, cut line, layer order, element placement and travel room |
05
Closing the shaker area and finishing the edge
A shaker keychain is built as a stack, and that stack has to be closed all the way around the cavity holding the loose pieces. The closing line is not the same as the outer silhouette. Before you send art, decide where the cavity ends: a border that runs inside the outer contour, or a border that follows the character outline. Everything the moving pieces can reach sits inside that line, so it also sets how far a floating element travels before it stops. Mark that boundary on your own file first, so you and the supplier are naming the same line during proof review.
Edge treatment changes how the finished piece reads, and it changes what you sign off on. Ask which edge finish applies to the outer contour, then check the proof against that answer. A border running parallel to the outer edge keeps an even band of clear acrylic between the cavity and the outside. A border that traces the artwork gives a tighter shape but leaves less room in narrow areas such as a wrist, a ponytail or a thin prop. Where the art pinches thin, the closing line and the outer edge compete for the same strip of material.
A proof for a design with moving parts should show more than the flat art. Ask to see the outer cut contour, the closed shaker area and the resting position of every moving piece on the same view. Then run these checks: the closing line never crosses the face, a text block or a logo; the band between the cavity and the outer edge holds an even width; no corner of the shaker area lands where the acrylic gets thin; and each floating piece has room to travel without settling on a protected zone.
When you approve, approve three separate things: the outer cut contour, the line that closes the shaker area, and the edge finish on the outer contour. If one of those shifts after approval, the layer stack and the placement notes for the moving pieces shift with it. Label each line on the art you send so the proof review does not stall on a guess about which boundary is which.
- Outer cut contour: the silhouette of the finished charm.
- Closing line: the boundary that seals the loose pieces inside the cavity.
- Clear band: the strip of acrylic between the closing line and the outer edge.
- Edge finish: confirm which finish applies to the outer contour, and review the proof against it.
- Resting position: where each moving piece sits when the piece is still.
| Spec item | What to confirm | Why it blocks the next step |
|---|---|---|
| Finished width and height | Overall footprint of the cut contour, measured apart from the shaker area | Sizing sets how much room the moving elements have |
| Overall thickness | The finished thickness you are approving | Thickness is the number your hardware choice has to suit |
| Edge treatment | How the outer edge and the shaker area edge are finished | The cut contour is drawn to match the edge treatment |
| Closing of the shaker area | How the loose pieces are enclosed and where the closed edge runs | The closing detail is part of the spec you approve, not an afterthought |
| Hanging hole clearance | The band of clear acrylic that stays between the shaker area and the hole | The hole must not break into the shaker area |
| Hardware and attachment points | Which keychain hardware is used and where it attaches | Attachment points are fixed before the cut contour is final |
06
Hanging hole clearance and keychain hardware
The hanging hole and the shaker area are two separate openings, and they should not compete for the same band of acrylic. Place the hole in a zone where no printed layer sits and no moving piece travels. Around it, keep a continuous band of clear acrylic with no art, no sealed channel and no cut line running into it. That band carries the weight of the piece once it hangs on a ring or clip. Ask the supplier to confirm the minimum clear band for the acrylic thickness you pick, and mark that protected zone on your cut contour before you send files.
Confirm the hole before you confirm the hardware. A hole sized for a thin split ring will not sit the same way on a heavier clasp, and a shaker body pulls harder on its ring than a flat keychain of the same width. Ask for the finished hole diameter, how the hole is formed, and whether it is cut in the same pass as the outer contour. If the body is wide, position the hole so the piece hangs level instead of tipping forward under its own weight.
Name the hardware and the attachment point in your order notes, not in a separate message. State the hardware type, the finish, and where on the body it connects. Say whether the ring passes through the hole directly or through a small jump ring. Confirm the hardware is included with the finished piece or supplied separately, and whether it arrives attached or loose in the bag. If you plan a series, lock the attachment position now so every charm hangs at the same height on a display.
- Protected zone around the hole: clear acrylic only, no printed layer, no shaker channel, no cut line crossing it
- Ask the supplier for: minimum clear band, finished hole diameter, how the hole is formed
- Specify in writing: hardware type, finish, attachment point, attached or loose in the bag
- For a series, keep the attachment point in one position so charms hang level together
07
Finished size, overall thickness and the specs you confirm before a quote
Start with finished width and height at the widest point of the piece, not the size of the character alone. If a tail, wing or hanging element extends past the body, that element sets the outer dimension. Give each number in inches and in millimeters so a unit conversion never lands mid-production. If the outline is rounded, note the corner radius you want. Then mark the footprint of the shaker area inside that outline: the closed pocket the loose pieces travel in. A shaker body needs an outer rim of material around the pocket, and that rim is part of the size you are quoting. Confirm both numbers against the artwork file before you send anything.
Overall thickness is a separate decision from artwork size, and it is the number most likely to cause rework later. Ask what the total thickness covers. It should account for the front printed layer, the back printed layer and the gap the floating elements move in. If a chain, split ring or second attachment point sits on the piece, confirm it fits inside the thickness you approved. Confirm the edge finish you are specifying at the same time, and confirm how the shaker area is closed so the loose pieces stay inside. Write the answer down next to the size.
Before you request a quote, assemble one short spec block: finished width and height, outline shape and any corner radius, overall thickness, edge finish, shaker area footprint, closure method, hardware type and attachment point, quantity, and the file package. Send it as a single list rather than across several messages. Ask directly which of those items change the price and which do not, so you know what to hold fixed. If the supplier quotes from a drawing, ask whether the proof will show the outer contour and the shaker area as separate shapes. That one question prevents the most common rework loop.
- Finished width and height at the widest point, stated in inches and millimeters
- Outline shape and corner radius, if the contour is rounded
- Footprint of the shaker area inside the outer contour
- Overall thickness, including the gap the floating elements travel in
- Edge finish and how the shaker area is closed
- Hardware type and attachment point, plus the clear band around the hanging hole
- Quantity for the drop
- One combined spec block sent alongside the art files
08
The file package a shaker keychain order needs
Build the order as a folder, not as one flattened image. Send each layer as its own transparent PNG at the same finished dimensions, with alpha intact so nothing arrives sitting on a white box. Name the files by role: background, moving piece 1, moving piece 2, foreground. Keep the loose elements as separate objects rather than one merged group, because each one needs its own size callout and its own placement note later in the proof. A flattened file forces the supplier to guess which shapes travel inside the shaker area and which shapes print on the sealed body, and that guess is where rework starts.
The cut contour is the outline of the finished acrylic body, so it follows the closed shaker area and the tab around the hanging hole. Draw it as a closed path on a layer you label as the cut. Do not trace the loose pieces with it. If you send raster art, keep the contour one flat color against a contrasting background so it can be traced without interpretation. Note any corner radius or notch you want carried through. The contour decides where the edge lands, so it is the element most worth locking before the quote is finalized.
Color intent travels with the art. State the working color space, list which areas are flat fills and which are gradients, and flag anything you expect to read as a translucent tint once it sits behind clear acrylic. Add one placement note per moving piece: where it sits when the keychain hangs upright, how large it is relative to the shaker area, and whether it rests at the bottom or floats. Written notes beat a mockup image, because a mockup shows one frame of motion and the factory needs the full travel range.
- Transparent PNG per layer, alpha preserved, named background, moving piece, foreground
- Closed vector cut contour on its own labeled layer, following the body outline only
- A one-page layer map listing print order from front to back
- Color intent: color space, flat fills versus gradients, any translucent tint
- One placement note per moving piece covering rest position, relative size and travel range
- A numbered contact sheet keyed to the file names so nothing is ambiguous at proof stage
09
What changes in the proof review when the design moves
A proof for a flat keychain shows one composite image and asks one question: is the art right. A shaker proof shows relationships instead. Ask to see the printed background layer, the position of each loose piece, the foreground layer, and the boundary line where the shaker area closes. A still image cannot show travel, so request the moving pieces drawn at the outer limits of their range as well as at rest. That is the only way to see whether a loose piece can drift across a face, a line of text or a logo once the piece is assembled.
Then read the drawing against the spec sheet. The cut contour should trace the outer shape you approved, including the clear band that stays around the hanging hole. Layer separation should match the layers named in the file package you sent, so a misplaced element surfaces now rather than after cutting. Color intent and keychain hardware callouts belong written on the proof, not carried in an email thread. Edge treatment and the method used to close the shaker area should be marked as well, because both change what the viewer sees at the perimeter of the piece.
Finish with a cross-check against your own placement notes. Every moving element should appear on the proof in the layer you assigned it to and at the position you described. Walk your protected zones one more time at each drawn position, not just the center one. Confirm the hanging hole band is still clear, that no loose piece overlaps a protected zone in any view, and that the hardware attachment point sits where you specified. Ask how the finished pieces are packed and whether any film must be removed before display, so your own handling notes stay accurate.
Approve only when the drawing, the layer split and the written specs agree with each other. If a note and the drawing disagree, the drawing is what gets produced.
- Outer cut contour matches the shape you approved, with the clear band around the hanging hole intact
- Every layer in the proof matches a layer named in your file package, with no element dropped or merged
- Each moving element is drawn at rest and at the extremes of its travel, not only at the center
- No moving element overlaps a face, text or logo zone in any drawn position
- Color intent is stated on the proof and matches the art you sent
- Hardware type and attachment point are labeled, including where the shaker area closes
- Placement notes for each loose piece are written into the proof, not left to the order email
- Packing and any film to remove before display are described for your handling notes
10
Where the shaker keychain sits in your merch lineup
Plan the shaker keychain as a top piece in the lineup, not the volume piece. It carries more parts than anything else in your small-goods range: a printed background layer, loose pieces moving inside a closed shaker area, a foreground layer if your split calls for one, and keychain hardware through the hanging hole. Each of those is a separate element you approve on the proof. Flat acrylic keychains stay your volume item because their artwork reads in one pass. Set your shaker quantity against the number of designs you can proof properly, not against the total number of units you want on the table.
Decide quantity per design before you request a quote. A shaker keychain spread across four characters is four separate proofs, each with its own set of floating-element placements to check. One or two shaker designs at a modest quantity is easier to review and easier to sell through at a convention than six designs at a count you cannot move. Keep the flat acrylic keychain or a small charm as the piece you order deep, and let the shaker sit above it as the higher tier of the same character art.
Tier the lineup so the shaker reads as the premium version of artwork a buyer already recognizes. A flat keychain of the character, a shaker built from the same illustration, and a connecting charm give a buyer three price points without three unrelated drawings. At Artist Alley, that structure lets you answer someone who likes the art but not the top price. Ask your supplier which pieces in the group can share one proof, so you are not rebuilding the layer split, cut contour and placement notes for every tier.
Check how the shaker sits physically beside the rest of the drop. Confirm with your supplier how the finished shaker body compares with your flat acrylic keychains and charms when you pack a set on one card or in one bag. If you plan to attach a charm alongside the keychain hardware, confirm the attachment point on the proof. Archive the approved layer split, cut contour and placement notes so a reorder does not restart the proof review.
- Keep flat acrylic keychains as the volume tier and let the shaker keychain carry the top tier.
- Count designs, not just units: every shaker design needs its own proof and its own floating-element placements.
- Order deep on the simplest piece in the set and shallower on the piece with moving parts.
- Pair the shaker with a flat keychain or connecting charm of the same character so the tiers read as one family.
- Confirm packaging compatibility, since a shaker body and a flat keychain may not sit in the same card or bag the same way.
- Store the approved layer split, cut contour and placement notes for future runs.
FAQ
Frequently asked questions
What is the difference between a shaker keychain and a flat single-layer acrylic keychain?
A flat single-layer keychain carries one printed layer that the viewer reads through the acrylic. A shaker keychain adds loose floating elements that move across the artwork inside a closed shaker area, so the design has to be separated into a background, the moving elements and a foreground before it is quoted.
Which parts of my illustration should stay unobstructed?
The character's face, any text and any logo. Those are the elements a moving piece must not hide, so place floating elements where they can partly cover the art without blocking what the buyer is reading.
What files should travel with a shaker keychain order?
A transparent PNG, the cut contour, the layer separation, your color intent and a placement note for each moving element. The placement notes are what let the supplier position the loose pieces in the proof.
How much clear acrylic should stay around the hanging hole?
Enough that the hole never breaks into the shaker area. Confirm the clearance with your supplier as part of the spec review, alongside the hardware you have chosen, and treat it as an approved number rather than a guess.
How is the proof review different when the design has moving parts?
The proof adds checks that a flat keychain does not need: layer order, the starting position of every floating element, how far each one can travel, and whether the cut contour keeps the shaker area separate from the hanging hole. Run those checks before production, not after.
Can a shaker keychain sit alongside flat keychains in the same drop?
Yes. It works as a higher-detail add-on next to flat acrylic keychains, charms and other small items, and because it is a different construction it belongs in its own price tier. Decide quantity per design before you set the tiers.